
How to Add a Social Sharing Image to Your Squarespace Website
If you’re sharing pages from your website on social media platforms like Facebook, LinkedIn, or X (formerly Twitter), you know how important it is to have the right image accompany your links. A well-chosen social sharing image can make your content stand out and help reinforce your brand’s identity.
In this tutorial, I’ll guide you through the process of setting a default social sharing image for your entire website and customizing social sharing images for individual pages. Let’s make your social media links look amazing!
Watch the video
Check out the YouTube video below. 👇🏼
Why Add Social Sharing Images?
Social sharing images provide a visual preview for your content when it’s shared on platforms like Facebook or LinkedIn. These images:
Grab attention: A compelling image increases the chances of your links being clicked.
Enhance branding: Use images that reflect your business or the specific content being shared.
Improve user experience: Visitors know exactly what to expect when they click your link.
Setting a Default Social Sharing Image for Your Website
Here’s how to set a site-wide social sharing image that will appear whenever someone shares a link from your website:
Step 1: Access Social Sharing Settings
Log in to your Squarespace account and navigate to your site’s dashboard.
Click on the Settings icon in the bottom-left corner.
Step 2: Add a Social Logo
In the Settings menu, scroll down to the Social Sharing option under the “Website” section.
Click on Social Sharing and locate the field for adding a Social Logo.
Select an image from your library or upload a new one. For example, you might use your logo or a branded image.

Step 3: Save Your Changes
Once you’ve chosen your image, click Add to upload it.
Save your changes, and this image will now appear as the default whenever someone shares a page from your website.

Customizing Social Sharing Images for Individual Pages
Sometimes, a site-wide image isn’t enough. For example, if you’re showcasing a specific product or blog post, you might want an image that reflects that content. Here’s how to set a custom social sharing image for individual pages:
Step 1: Access Page Settings
Go to the Pages menu and locate the page you want to customize.
Click the Settings (gear) icon next to the page name.

Step 2: Choose a Custom Social Image
In the page settings menu, click on the Social Image tab.
You’ll see the default site-wide image. Click Add Image to replace it with a custom image.
Select a new image from your library or upload one that fits the page content.
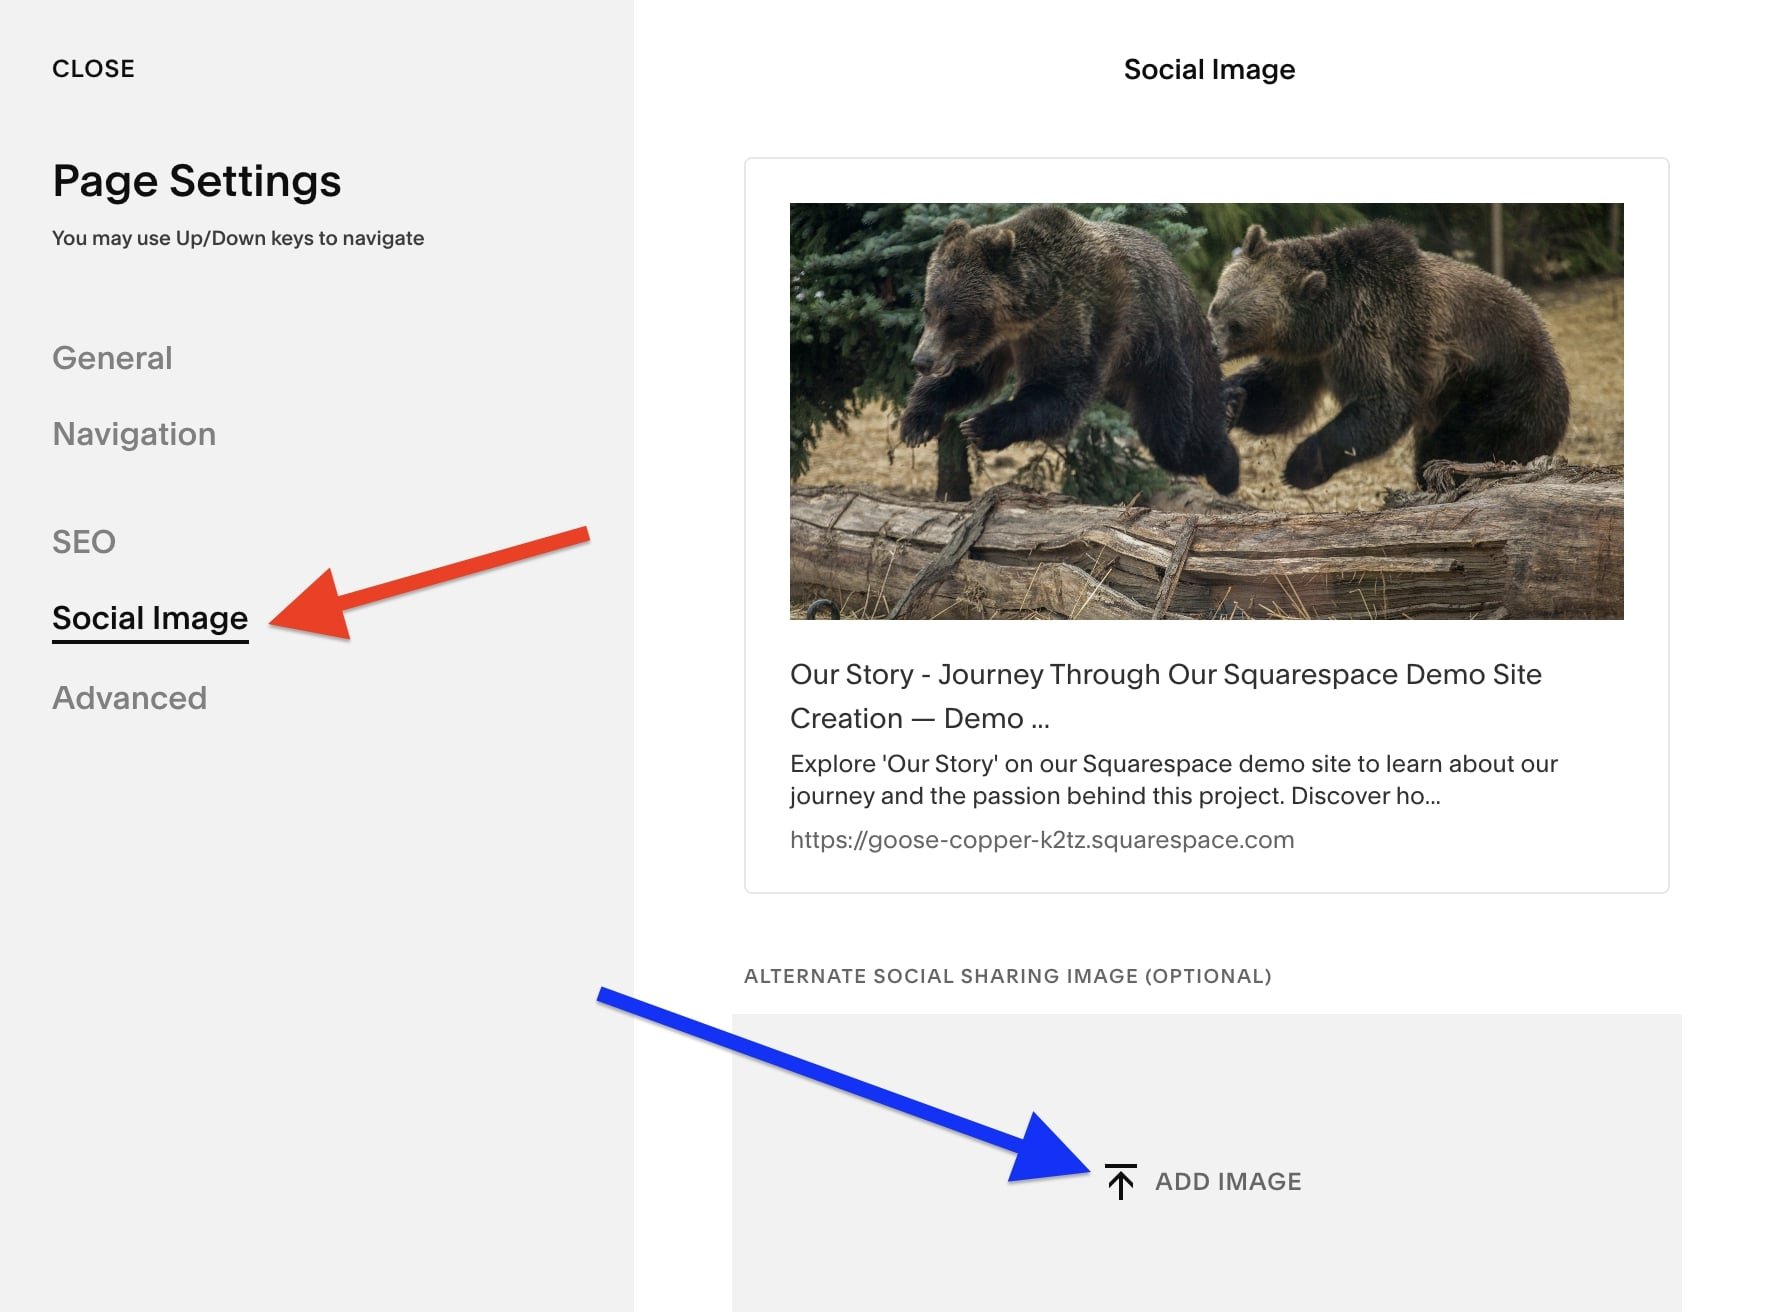
Step 3: Preview Your Changes
After adding the custom image, you’ll see a social preview showing how the link will appear on platforms like Facebook.
Save your changes to apply the new image to this page’s social shares.
Wrapping Up
Adding social sharing images to your Squarespace website is a simple yet powerful way to make your content more engaging on social media. Whether you’re setting a default image for your site or customizing individual pages, this feature ensures your links look polished and professional.
📨 Join my mailing list to get Squarespace tips & tricks right in your inbox

Your Designer
I'm Bryan, a Squarespace web designer and founder of Abound Web Design. I have worked with all types of businesses and organizations from preschools to publishing companies to chiropractic clinics and everything in between. If you want to discuss a potential project, you can email me at bryan@aboundwebdesign or get in touch with me here. Alternatively, you can book in a free 15-minute consultation call here.